A couple quick tips to up-level your photography on your next fishing trip.
Article written for Epic Fly Rods by Jess McGlothlin, a Montana-based writer, photographer, and traveling fly angler.
Spend enough time on the water fishing with friends and, at some point, someone is going to want pictures of their fish. It’s almost inevitable. We’re a digital society, and it’s nearly routine for people to want to snag a “grip and grin” to show their buddies and post on Instagram. Someone, at some point, is going to ask you, “Hey, can you get a pic of this?” as they wrap fingers around their catch and press it toward the camera (or phone, or whatever is handy).
And hey, there’s nothing wrong with that. In fact, fish photographs—and images of the places in which fish live, and the people who chase them there—have formed a 15-year career for me that’s taken me around the world. Fish live in pretty cool places, you know? And, for the most part, the people who go to those places to chase those fish are fairly fun to hang around.
Working across six continents and twenty-seven countries, I’ve watched different anglers shoot thousands of photographs while also shooting my own imagery. Throughout the process I’ve developed a few quick tips and routines to help make the job easier; helping the angler manage and position the fish for the best possible shot while also ensuring I’m in the right place with the right gear, ready to get the shot. Whether you’re shooting on your iPhone or the newest pricey mirror-less camera (or still using the workhorse DSLR like I am), here are a few highlights that might help you nail the next “Hey, man, can you take a photo?” moment.
Tips to Nail Your Next Photo
- Don’t shoot from eye level. Get low… on the fish’s level if possible. Move your feet. Change the angle. It’s amazing what shooting from a squat versus standing can do to make an image more interesting (and ensure the fish Is the hero of the shot.)
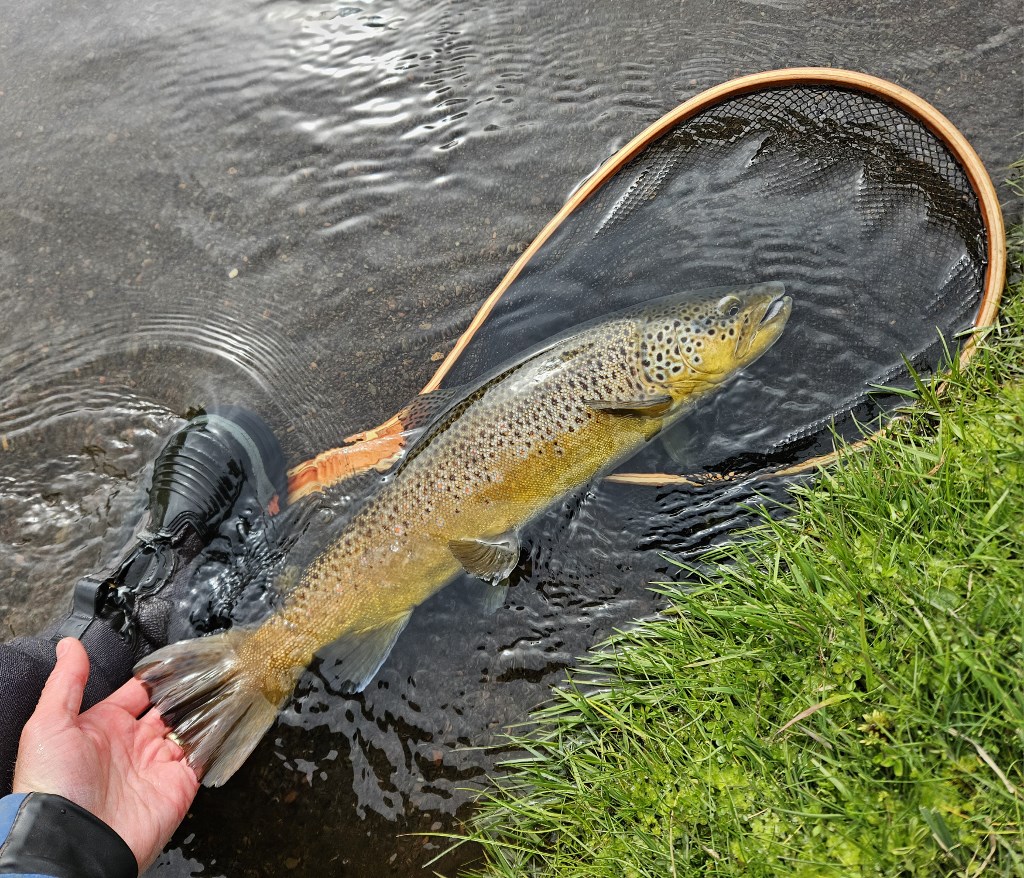
- Hold the fish right: keep your fingers out of the frame (ideally, curl them under the fish’s belly), and ensure you’re holding the tail from the back (aka the side closest to your body) so your hand isn’t blocking it for the image. Go ahead and tip the fish’s nose toward the camera and hold it out a bit—but don’t pretend you’re not making the fish look bigger. A good rule of thumb is to still keep your elbows close to your body. This position can show off the fish’s best angles, but don’t excessively “long-arm” the fish in an effort to gain perceived inches. These shots, made last October in Iceland while fishing for sea-run brown trout with Fish Partner, show guides who know how to hold fish well.
- Don’t feel like you have to do the “parrot” with the fly rod. A lot of anglers like to prop the reel and rod over their shoulder in every single image. It’s a great way to display your tools of choice when you’re standing in sand or surf, but in a boat or on a grassy bank, consider lying the rod down in the frame of the photo. (And don’t step on it in the process of getting the shot!) It’s another way to show off your favorite fly rod—the Bandit has been the rod I reach for lately for some saltwater shoots—without always having to have a reel over your shoulder.
- Change it up: Take a few shots with your buddy looking at the fish, sunglasses off and hat pushed back away from their face. This’ll give you the classic “I caught a big fish, look at me” image. I like to shoot a few with the angler interacting with the camera as well. Mix it up; see what the mood dictates.
- Focus on the fish’s eye. This is easier, obviously on species with big eyes (tarpon are one example), but even for trout it’s possible to draw focus on the fish’s eyeball. On phones, it’s wildly simple: just tap on the screen on the fish’s eye, and you’ll see the camera draw focus there.
- Keep the fish in the water as much as possible. Any fish you plan to catch and release should be kept in the water until both the cameraman and the angler are in position and ready to take the shot. If it’s possible, get into the water with the fish—this not only makes for much better images (remember that tip about getting on the fish’s level?)—but also helps maximize the fish’s time in the water. Ensure the angler wets their hands before lifting the fish and, once everyone is ready, I like to count to three before the angler lifts the fish up. A few quick images are snapped and then the fish goes into the water again while we make any necessary position adjustments. The goal is to have the fish out of the water for as short amount of time as possible, and you’ll find that those shots of a wet fish with water droplets cascading off it are so much more interesting than a dried-out, tacky-skinned, and (very likely) dead fish. And don’t forget to be ready for the release shot as the fish swims away, and for your buddy’s grin afterward.